Ringtone Doorbell: Open Hardware Advent Calendar Day 4
Today’s project is something new. Really new. Working as of an hour ago, new. It’s a customizable doorbell for kids to build.
Overview
The Ringtone Doorbell is a doorbell based on the Adafruit Trinket, meant for kids to build for their bedroom. They can customize the ringtone played by the bell using just about any RTTTL ringtone. For anyone who didn’t have a cell phone before about 2005, these long sequences of characters were how we used to add new ringtones on our phones. We’d sit there, keying them in on a numeric keypad, inevitably making a mistake so that it sounded completely wrong - but we’d eventually have the theme song from Beverly Hills Cop on our phones. (I’m old).


The project consists of a button, a Trinket microcontroller from Adafruit, some batteries, and a speaker. When you push the button, the ringtone you program into it plays. You can put in whatever ringtone you want, as long as you have a computer running the Arduino software, and a USB cable.
This is actually an updated version of a project I designed for McMaster University’s Venture Science and Engineering camp a number of years ago. Improvements in the tools available to us - like the Trinket - mean that this one is much easier for kids to customize and build.
Parts list
- 1 Half-size breadboard
- 1 Adafruit Trinket 5V
- 1 PCB-mount speaker
- 1 470 ohm resistor
- 1 10K ohm resistor
- 1 Button (I used a Pink arcade button)
- 1 3xAAA battery holder with switch (and batteries)
- Some hookup wires
- A computer running the Arduino software
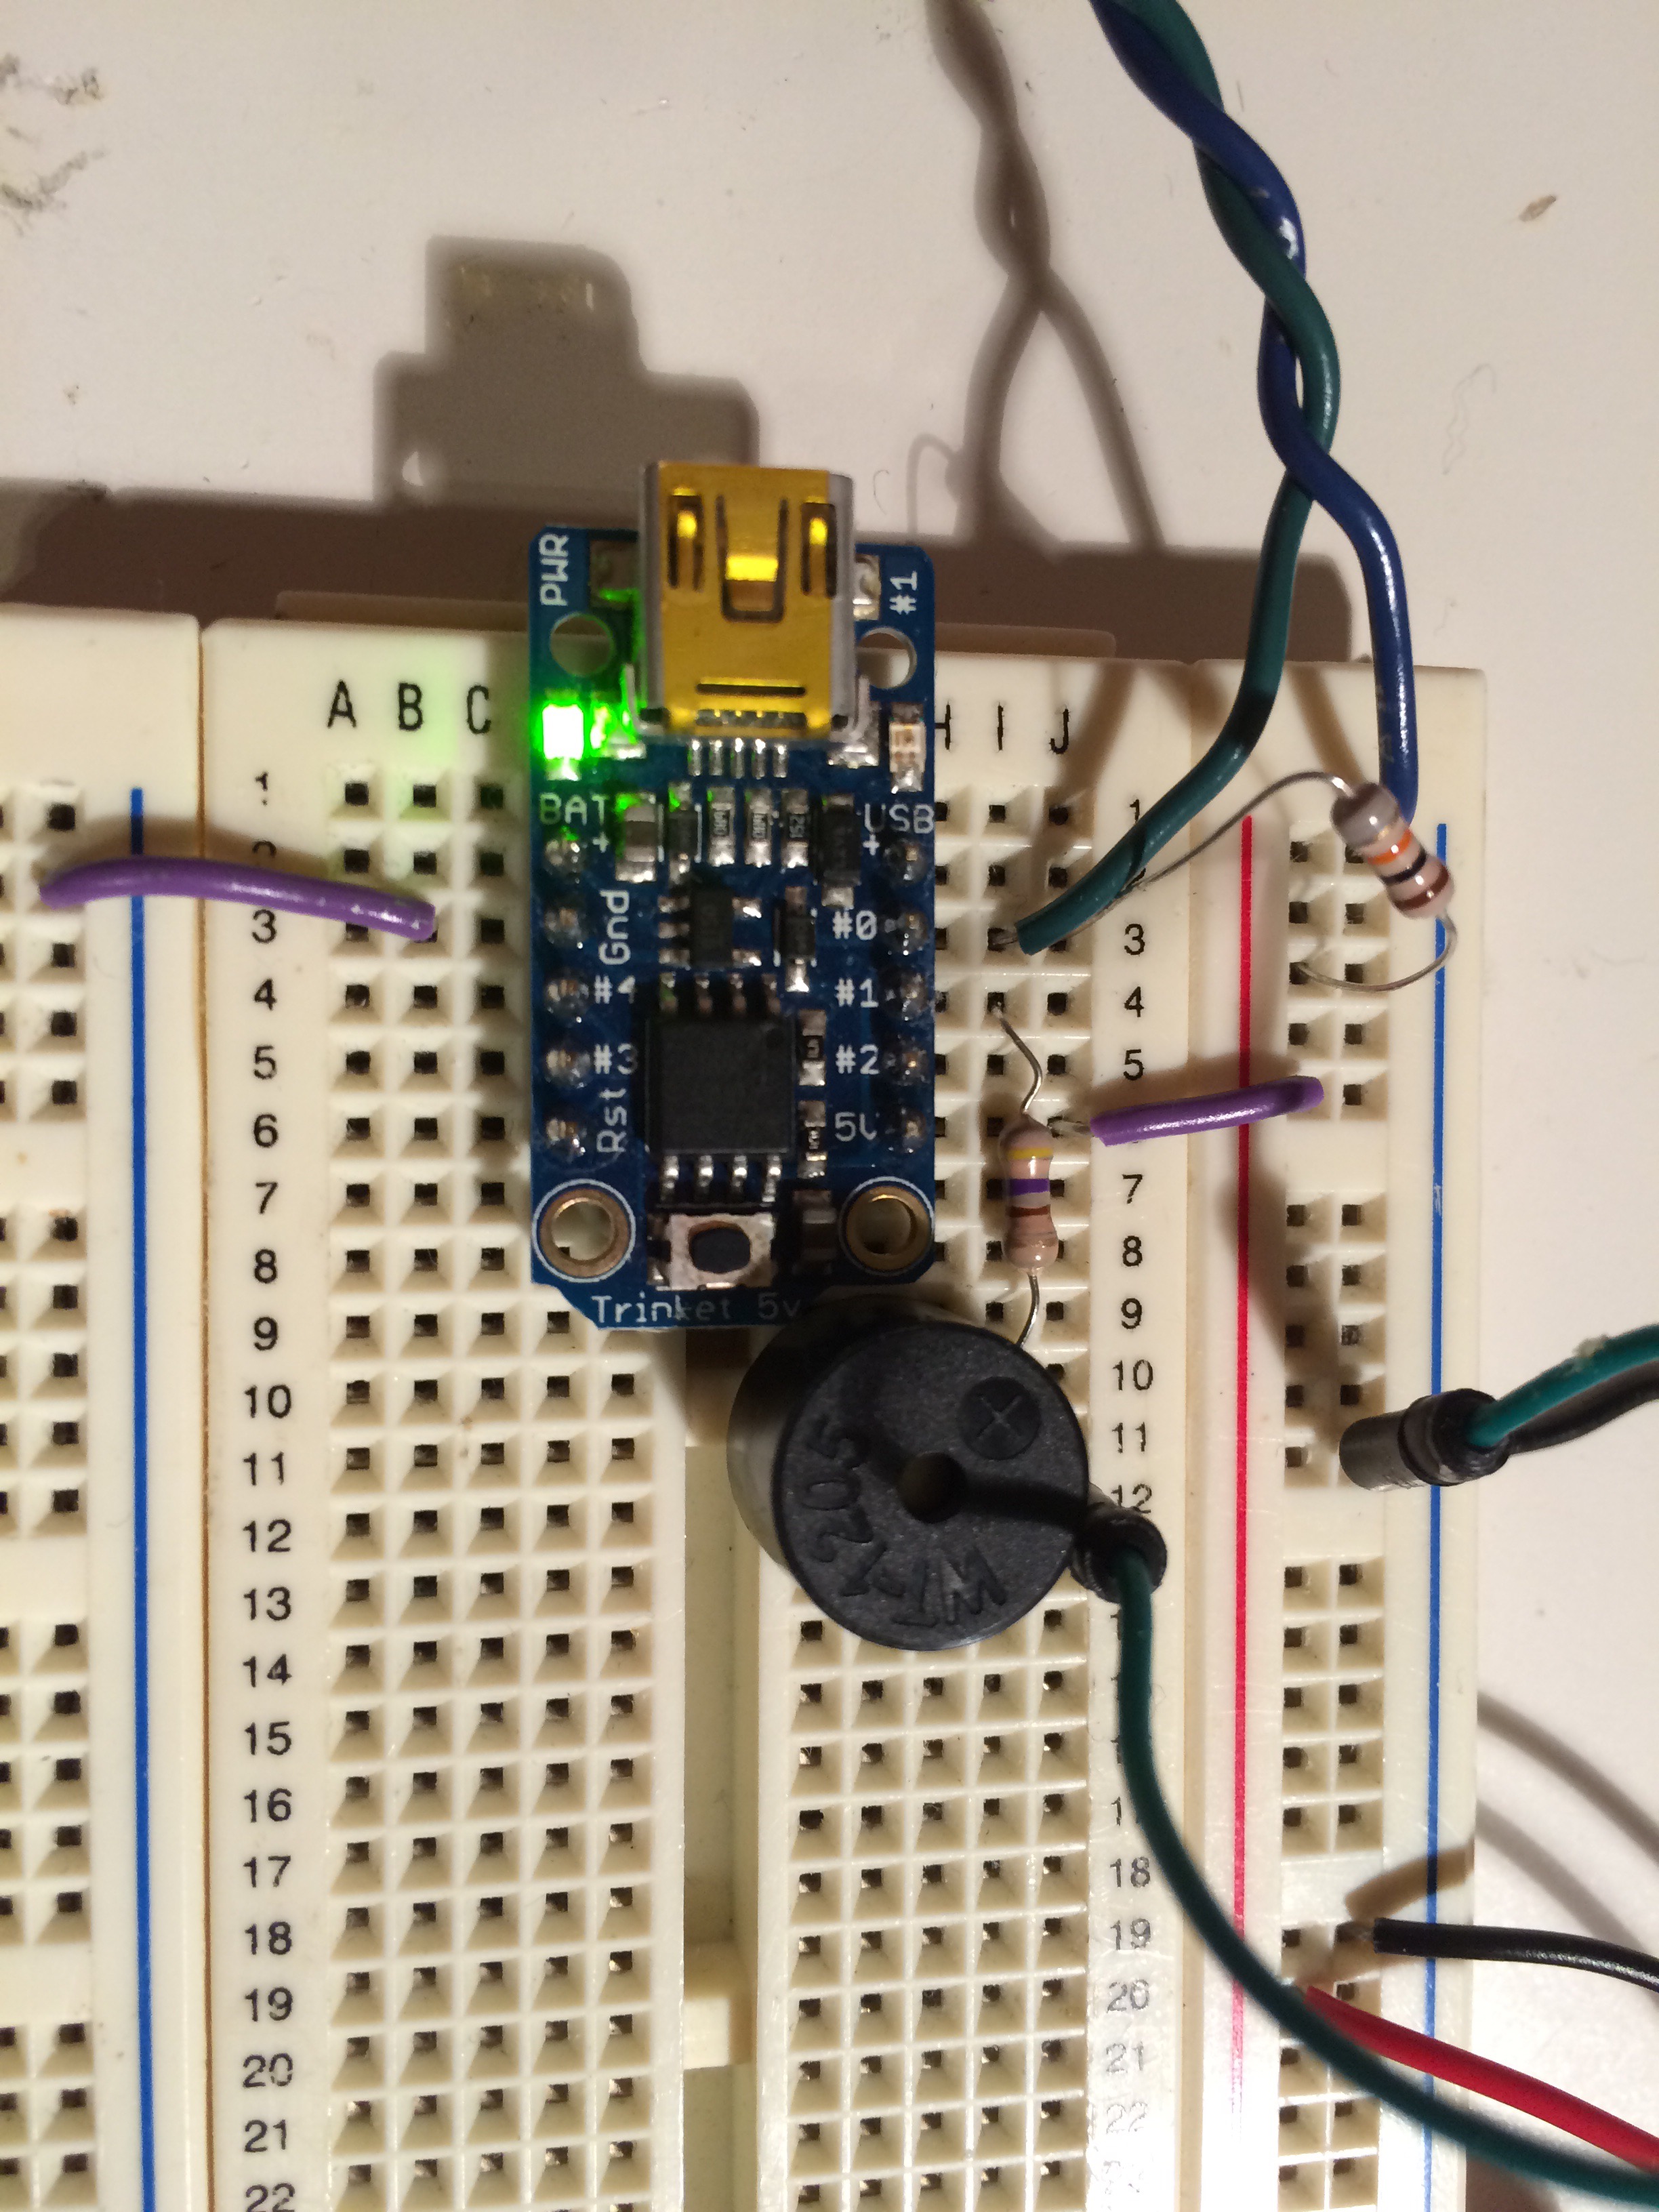
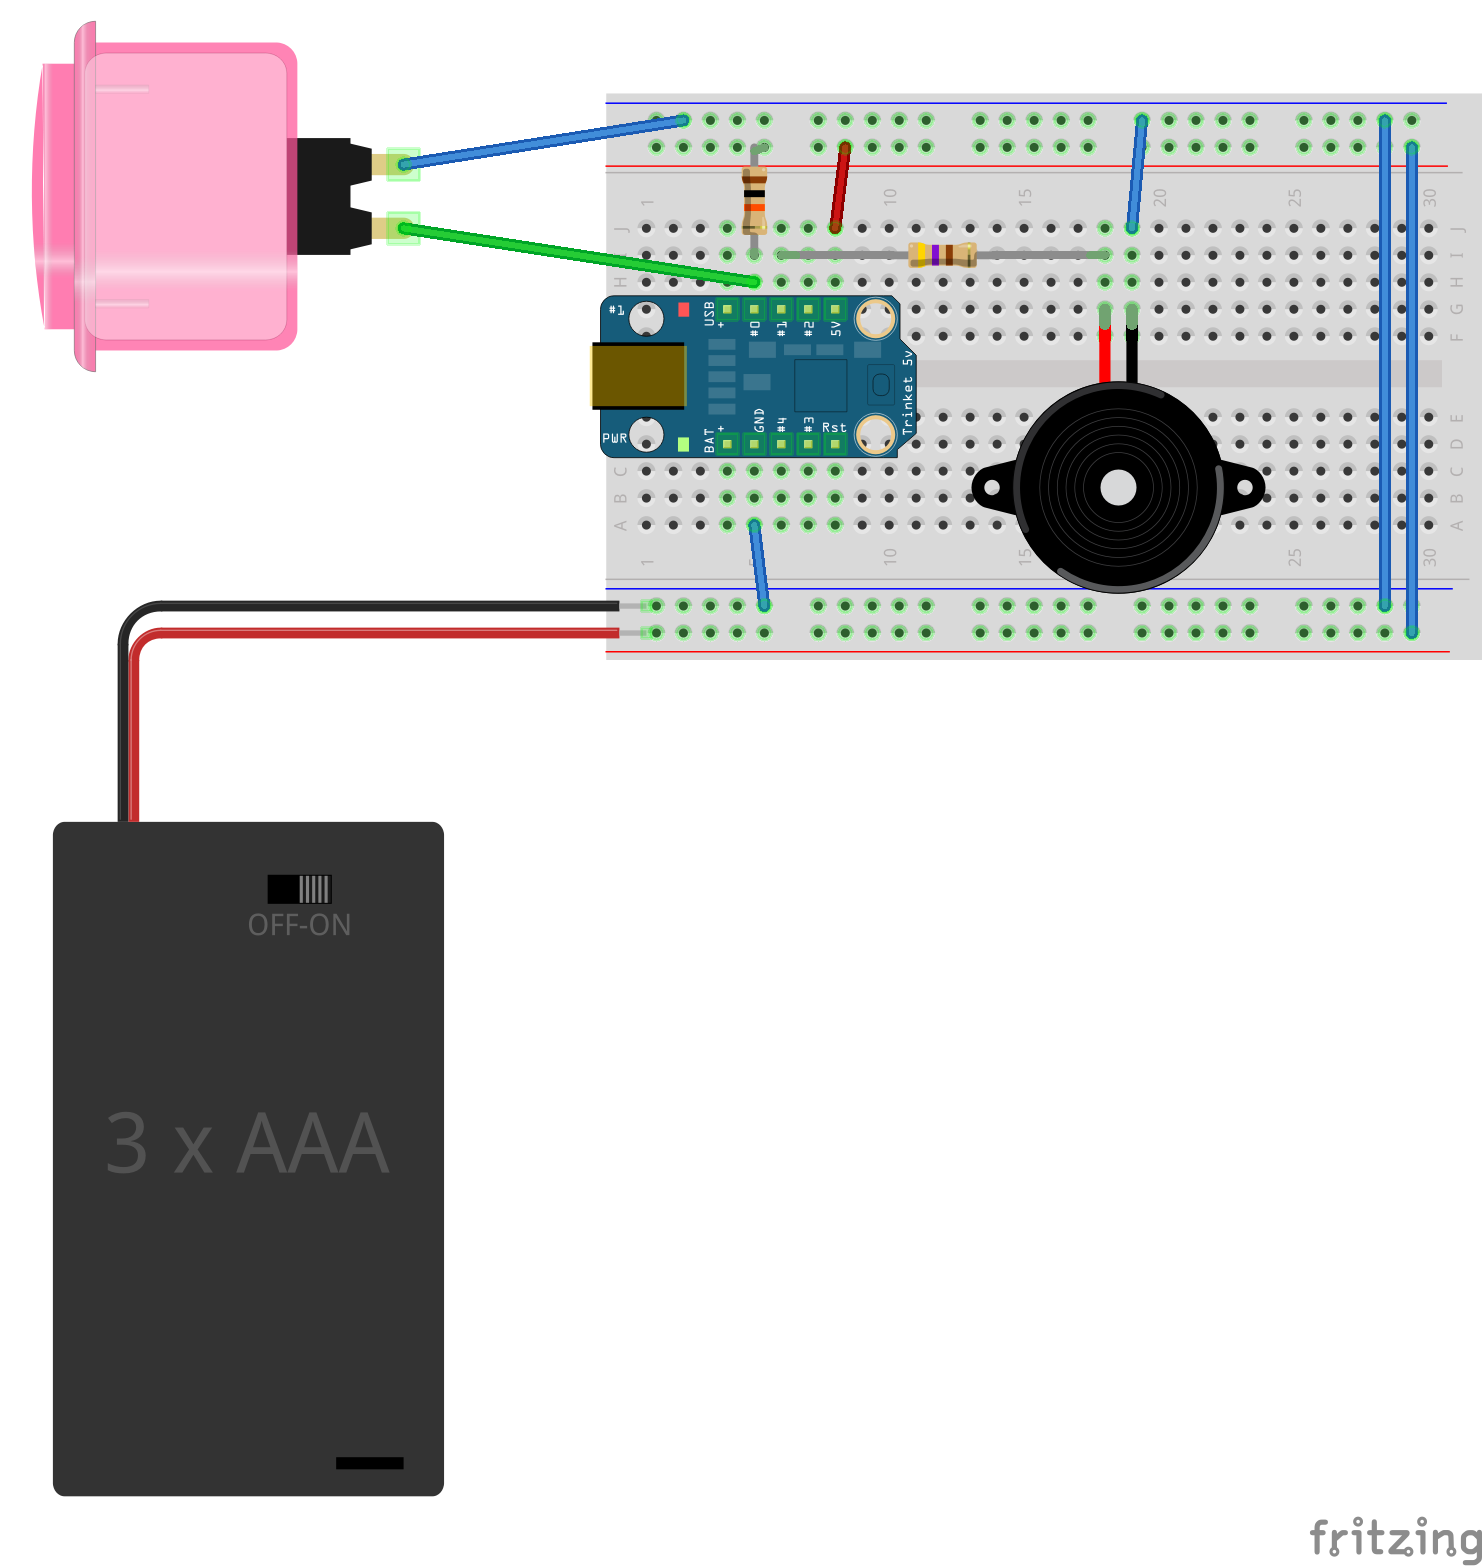
Building the hardware
Since this is another breadboard-based project, I again went with Fritzing for the connection diagram. Note that the resistor going from the pin marked #0 on the Trinket is the 10K, and the one going from the pin marked #1 to the speaker is the 470 ohm. I used a piezo speaker on the Fritzing diagram, but a small 8 ohm (or higher) speaker, or a PCB-mount speaker, should work OK.
Frizting files and source code can be downloaded from our GitHub page for the project.
You’ll need to solder some wire to the button’s pins - I twisted together a few feet of stranded 24 gauge wire. Stranded wire is better for something like this, since putting the button wherever it needs to go probably means it’s going to have to bend. You’ll want to tin the ends of the wire that plug into the breadboard with solder, to make sure they stay in the breadboard better.
Software setup
The Arduino sketch for this project requires that you install the Bounce library. Adafruit has good instructions on installing libraries. The Bounce library is used for debouncing the button - a common problem with buttons is that they don’t switch cleanly between on and off, and the bouncing around in between can cause software issues. We use special software to take care of this problem so that the bouncing doesn’t mess up our program. You’ll also need follow Adafruit’s instructions for setting up the Arduino software to work with the Trinket.
The source code for the Arduino sketch can be downloaded from our GitHub page for the project.
The software uses code borrowed from the Arduino RTTTL library coupled with some tone generation code for the Trinket. I may clean up this library at some point and make it available separately.
To customize the ringtone, you’ll need to find another ringtone to use. Right now, it’s loaded with the theme song from the movie Rocky. (I’m old). You can find other songs here, and here, and here, and many other places with RTTTL ringtones. Googling should find you a bunch. Open the Arduino sketch, and find the place in the code that reads:
const char song_P[] PROGMEM = “(a bunch of stuff)”;
and put your ringtone in between the quotation marks.
Then, you should be set to load the code onto the Trinket. The Blink section on this page goes over the steps required for that.
Once it’s done loading, you should be able to press the button and have it play your ringtone! The red LED on the Trinket will blink along with the music.
Future improvements
I don’t have any future improvements planned for this project, but there’s plenty that could be done to make it cooler. The USB interface on the Trinket could be used to send a message to your computer, showing you a message that someone’s at the door if you have headphones on or something. You could also hook up a servo motor to it to wave a flag if someone’s there. There are a lot of possibilities for enhancements.
Conclusion
I’ve seen kids have a lot of fun playing with this project in the past, so I hope it’s one that more can enjoy in the future. It doesn’t have a lot of parts, but does open a few doors for electronics and programming.