Electric Imp Breakout: Open Hardware Advent Calendar Day 12
Today’s entry is a fairly simple one, but it’s a building block for a future project: a breakout board for the Electric Imp.
Overview
The Electric Imp is a development platform for making devices that connect to the Internet. It’s a module containing a fairly fast microcontroller and a WiFi chip, with software that handles the WiFi connection, and connects to Electric Imp’s servers. From there, it determines which software it’s supposed to run, downloads the latest version, and runs it. The really powerful part here is that you - the developer - write that software, and put it on Electric Imp’s servers. This way, you make sure that every device that you ship always has the latest software.
All of the Imp modules that are available are pretty tiny, but the most common one for hobby applications and prototyping is the SD card size. It’s the same physical size as the memory card we all know and love, but instead of flash memory, it’s a microcontroller and WiFi interface.

The Electric Imp people make and sell a breakout board to let you more easily use the card - SD cards need at least a socket to be useful, after all. The April development board contains a power supply, SD card socket, and the serial number chip that the Imp needs to work. It’s a good deal at $12.50 US, but has some limitations:
- It uses a Mini USB jack for power. Micro USB is preferred these days
- It has no mounting holes, so it’s hard to permanently mount it in a project
- It’s cheap for one, but expensive if you need more than that. Which is a problem, because when working with Imp projects, the code that you develop on their server is tied to the serial number on the breakout board / in whatever system you’re developing. Which means you can switch the Imp module between boards and you’ll always have the right code - but it also means messing with things on the server if you only have one development board.
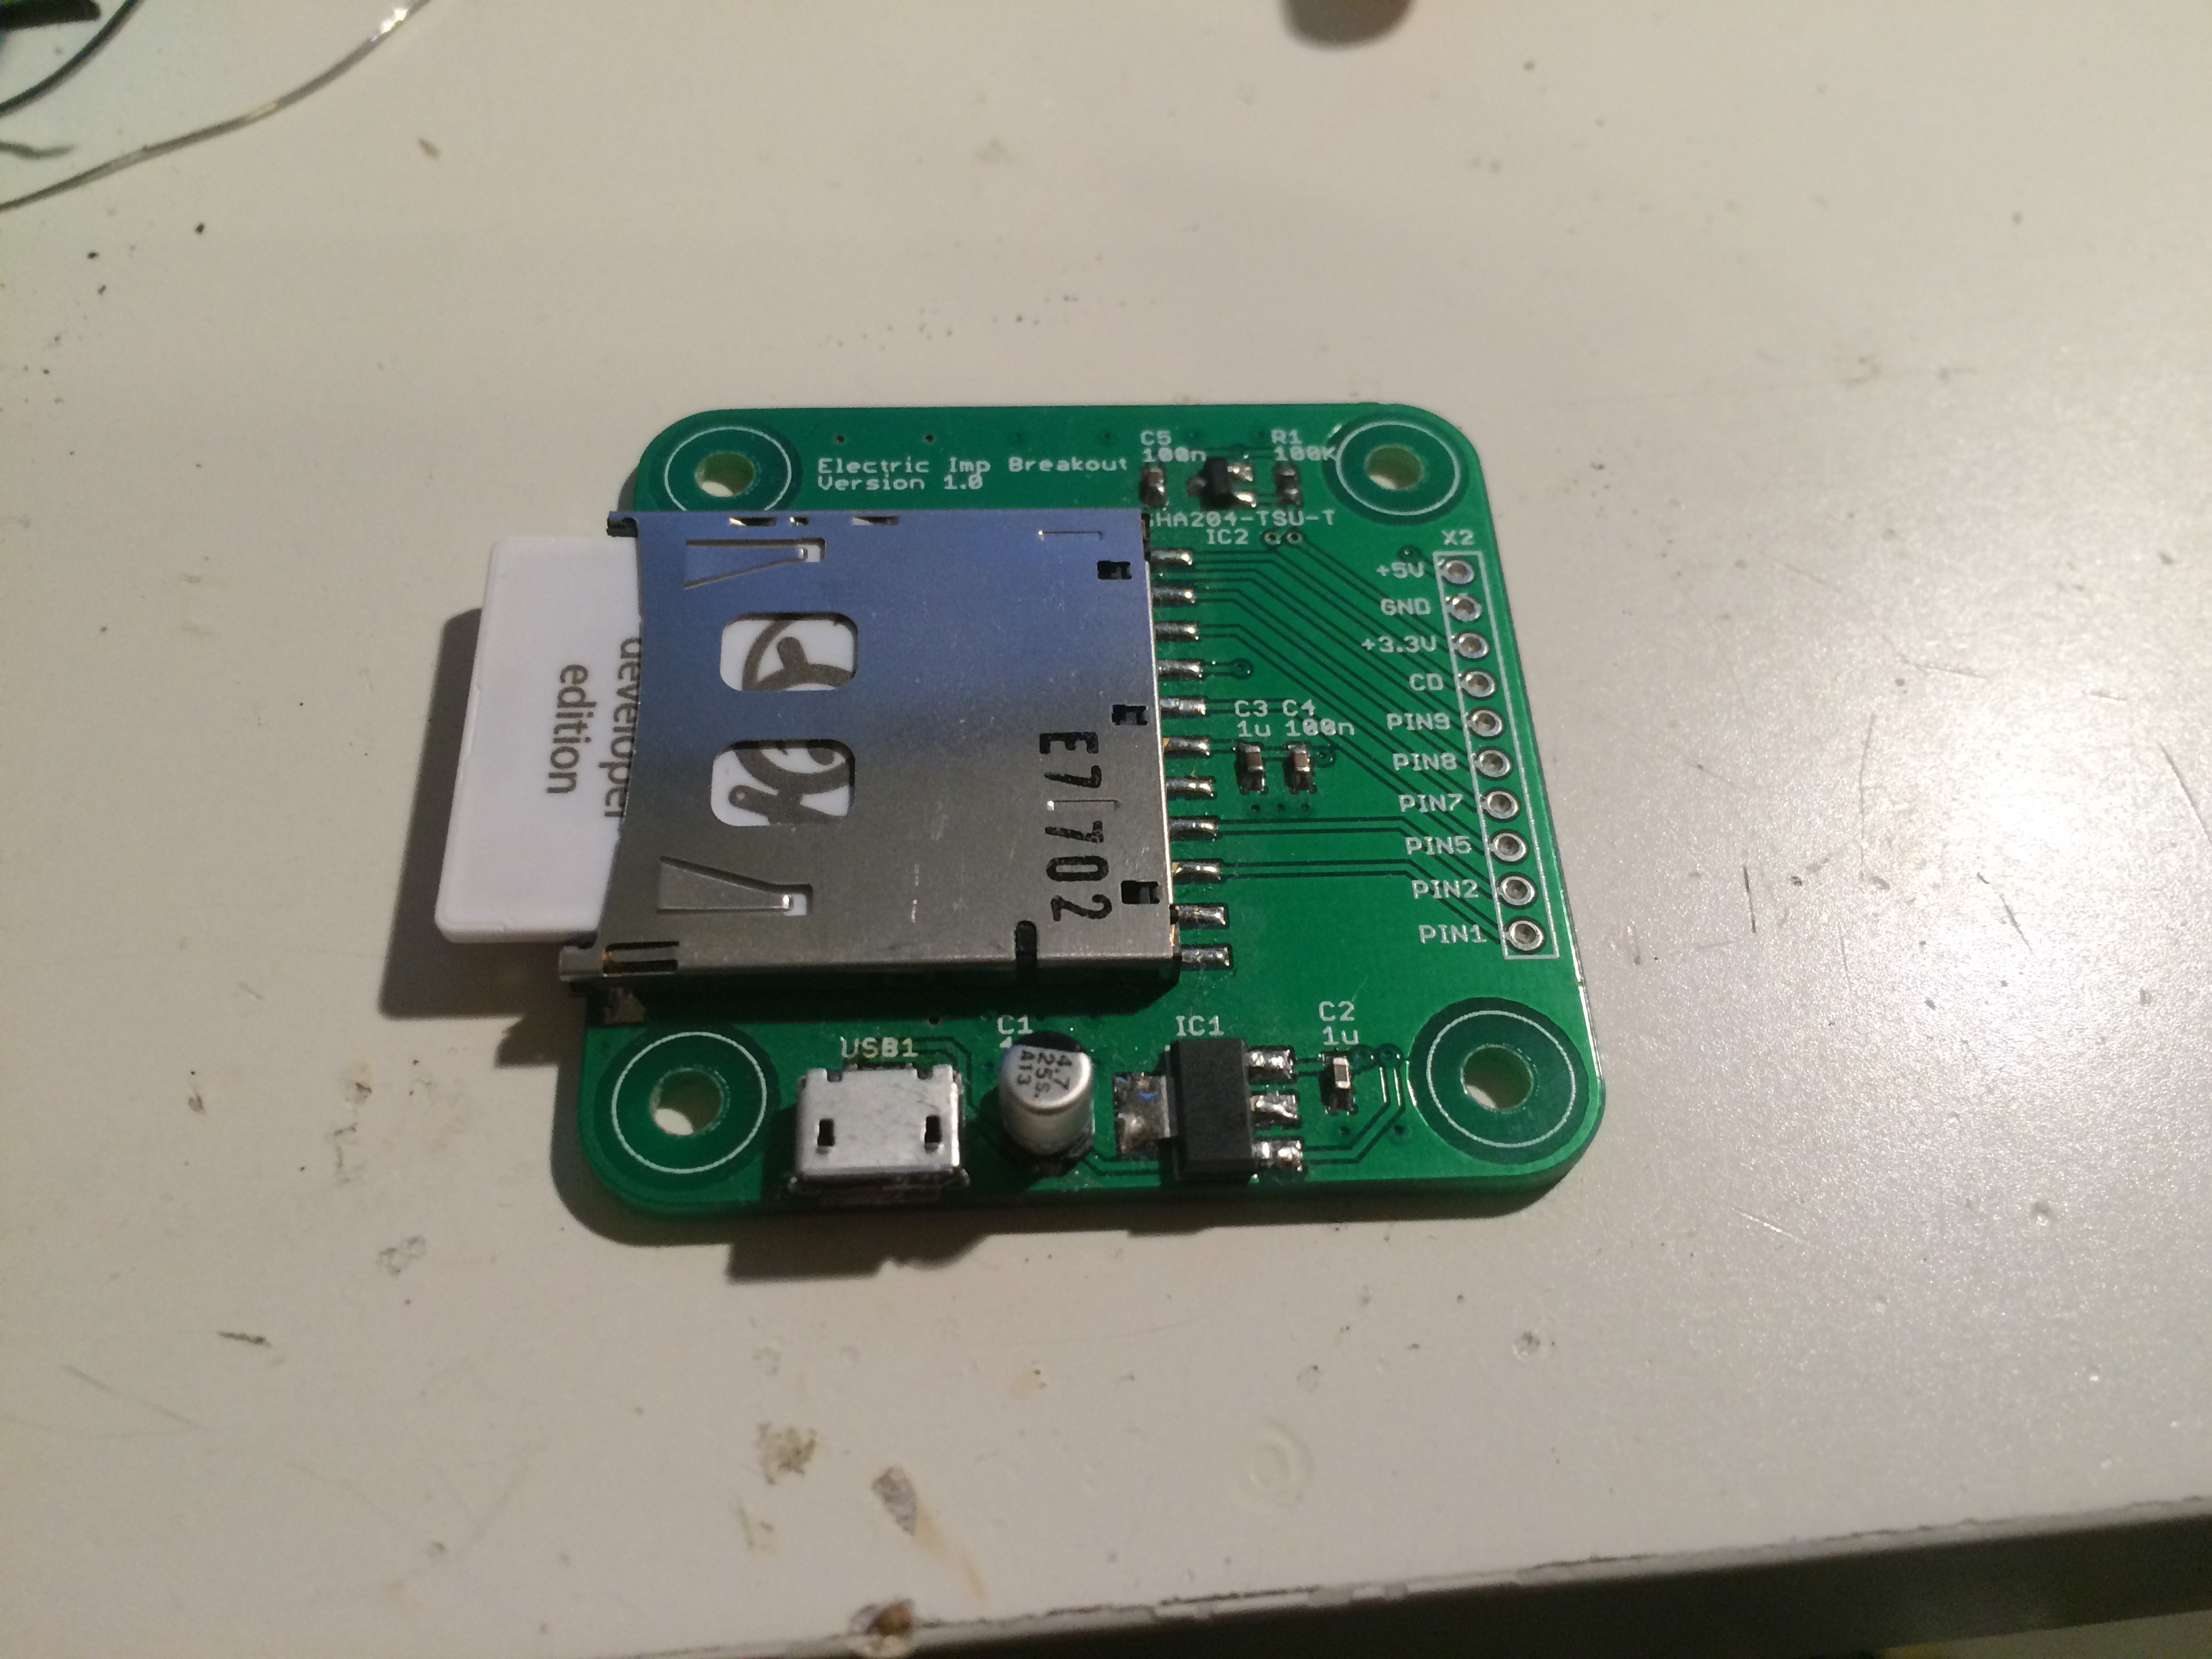
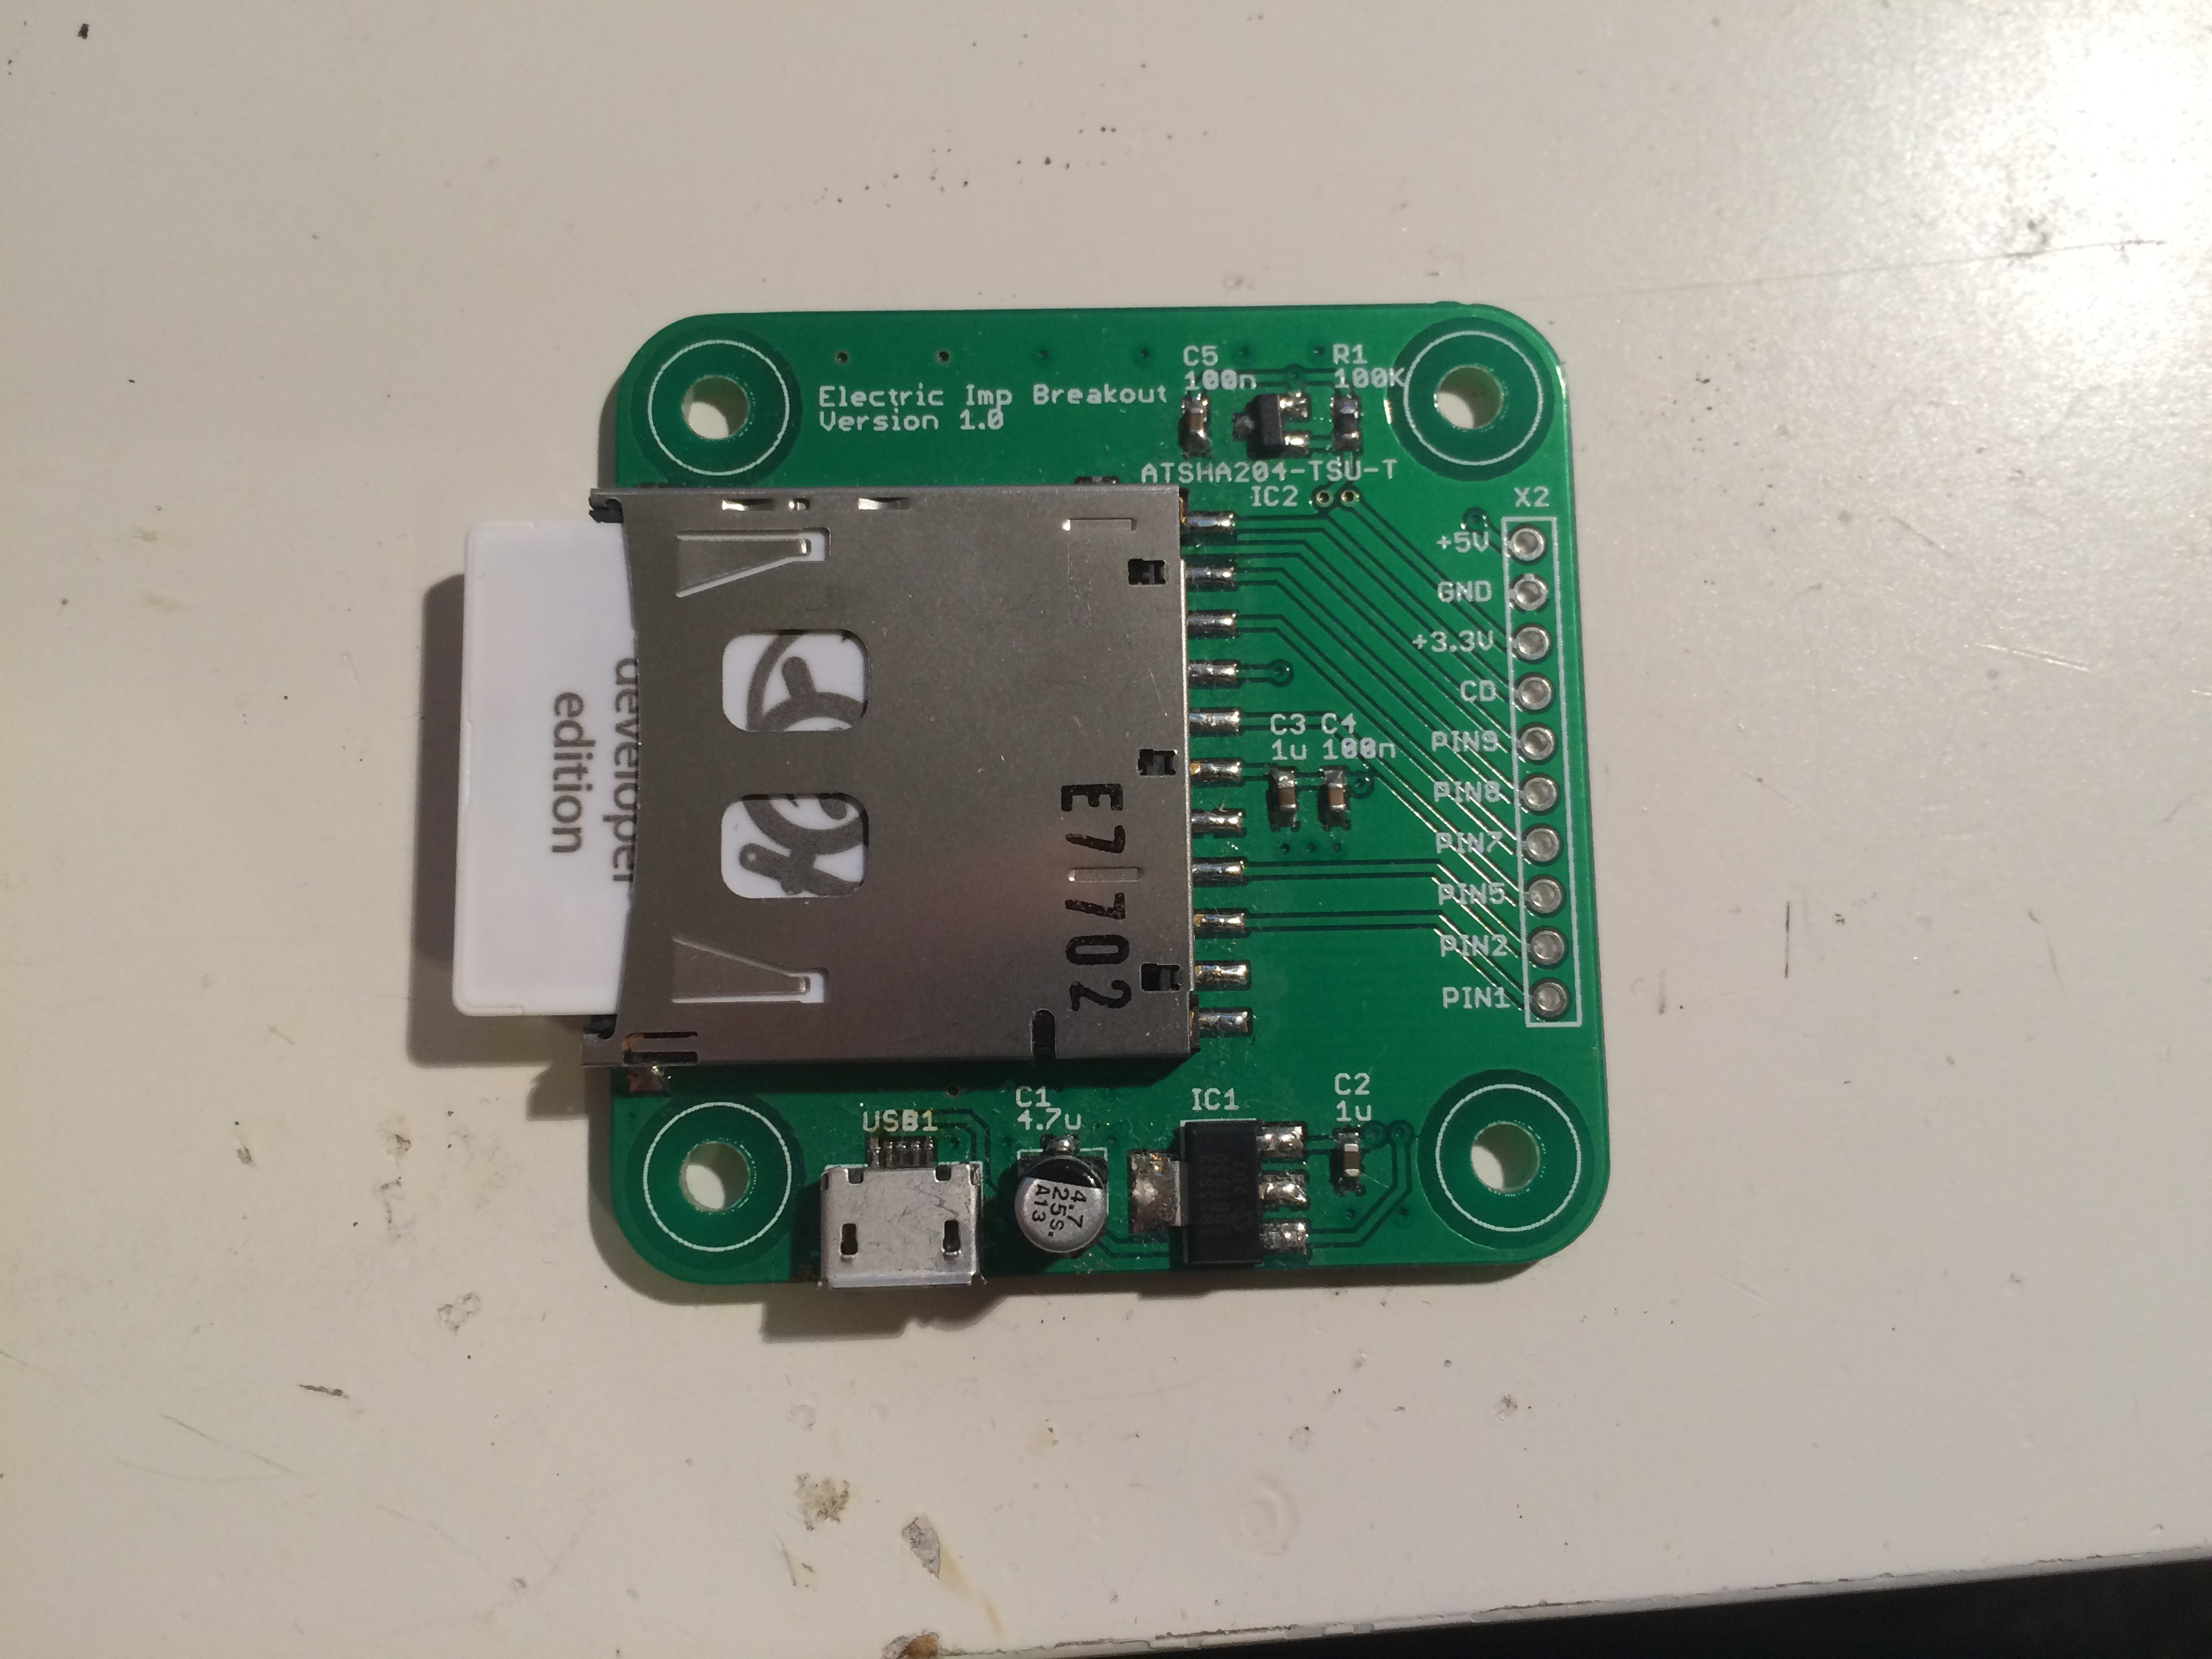
Because of those limitations, and because I have a stack of (now-discontinued) SD card sockets from a previous project, I decided to make my own breakout boad.
Hardware
The setup is really simple: a 5V to 3.3V power supply using a Microchip LDO, the Atmel serial number chip, some bypass capacitors, and connectors. All this in a board under 5x5cm, with 4 mounting holes for easy attachment.
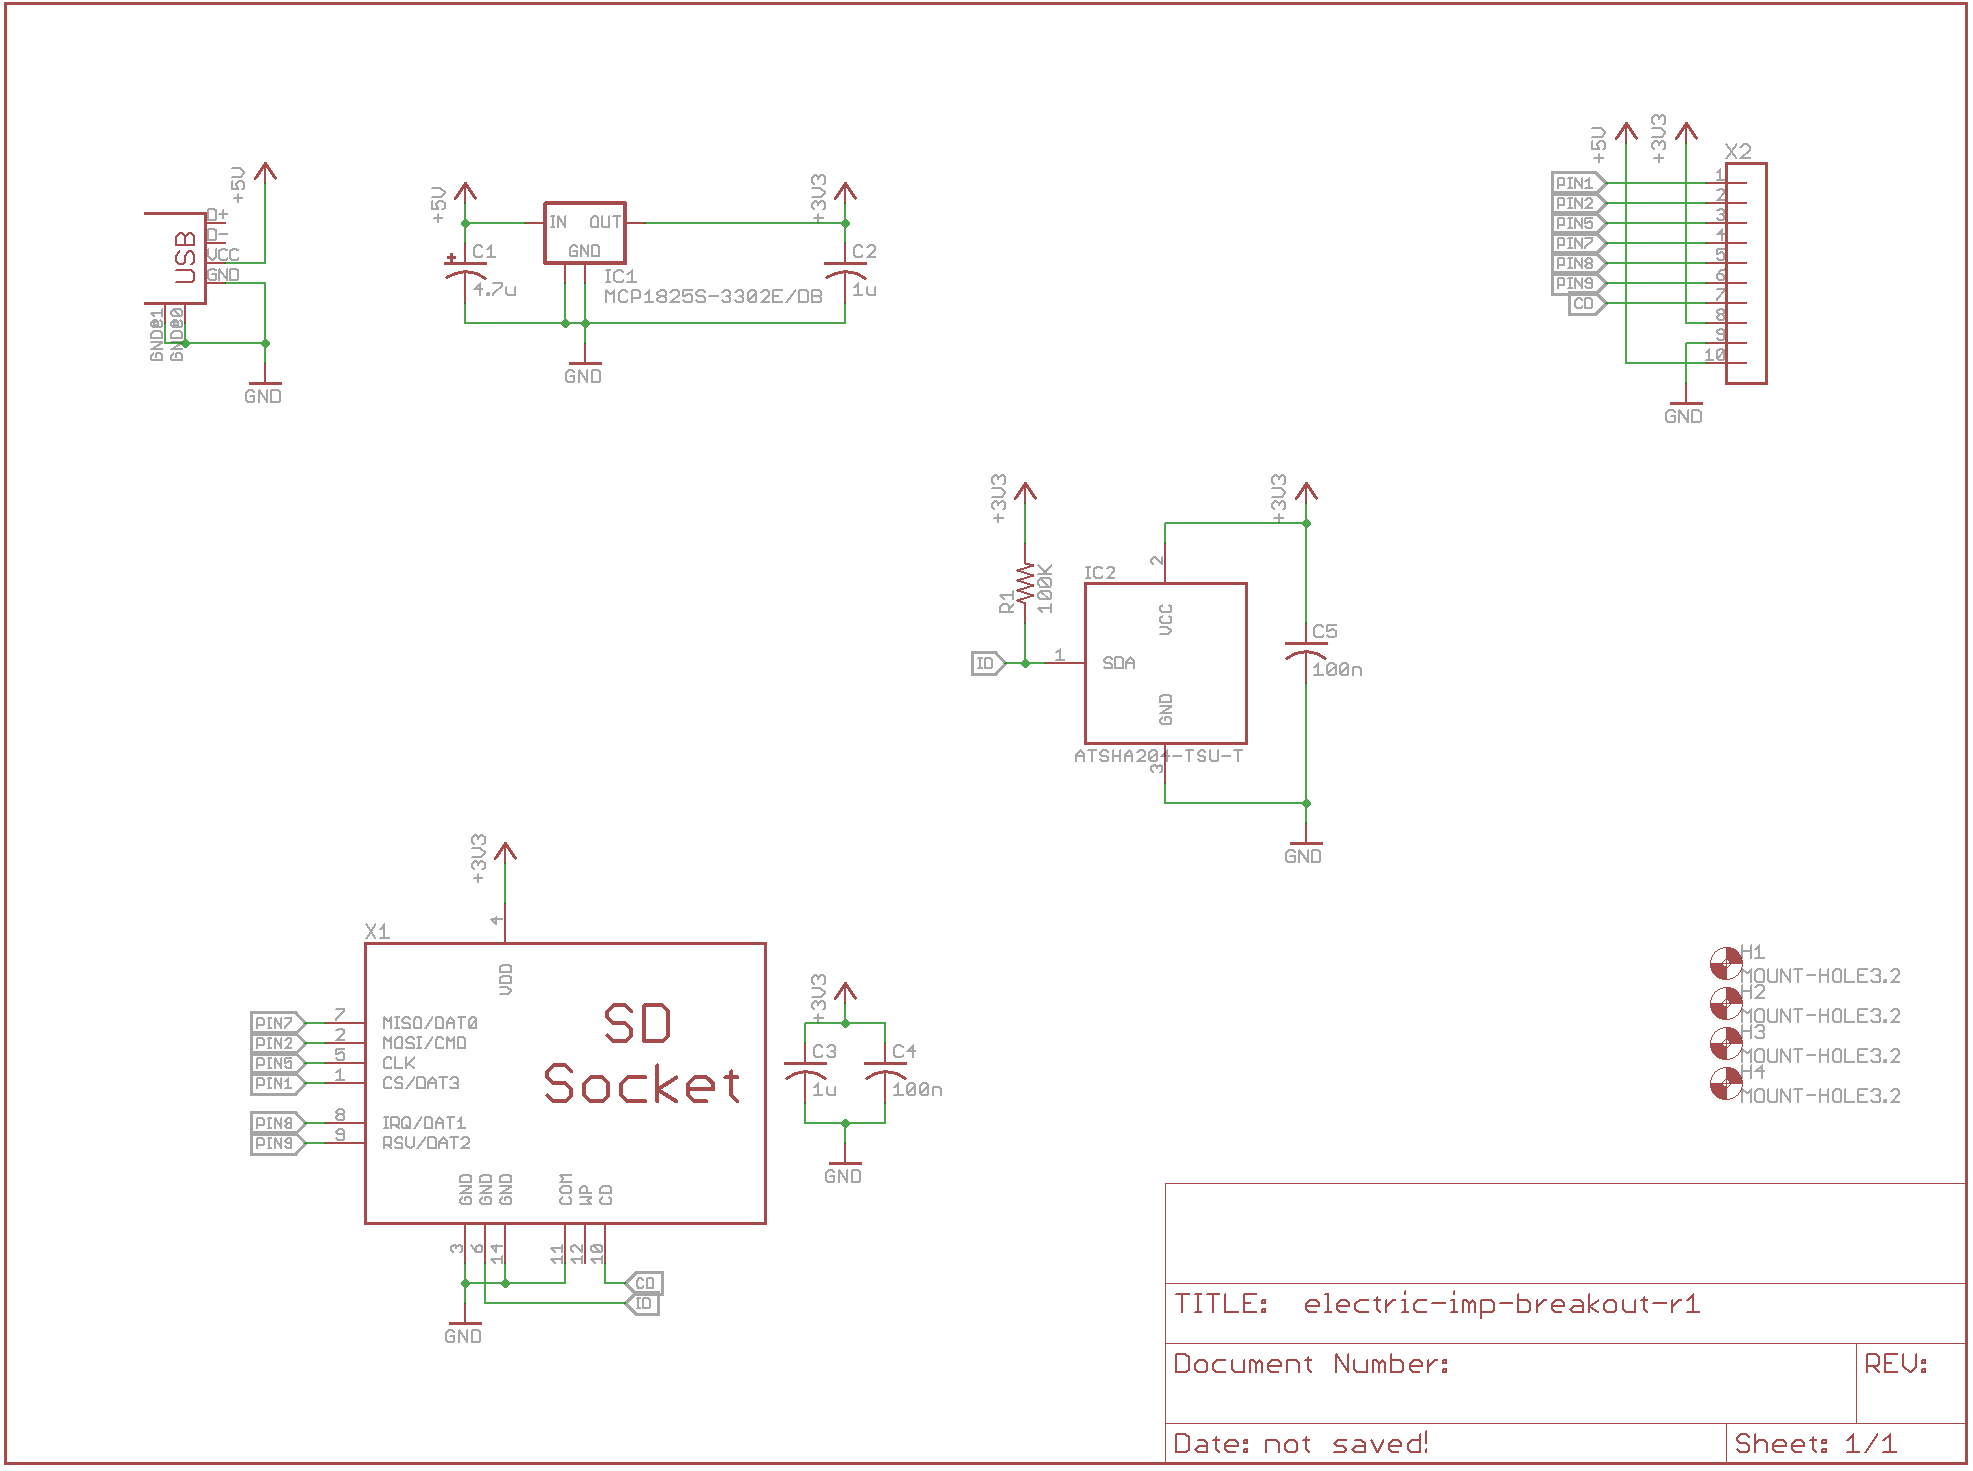
As always, schematic and PCB layout files can be found on our GitHub.
Future enhancements
There’s not much to be enhanced on this board - it’s pretty complete for what it needs to be, which is to provide the bare minimum needed to getting an Electric Imp running. About the only change I can see making is to replace the discontinued SD card socket with one that’s still made.
It will, however, be used in future projects.
Conclusion
This is a really basic, simple project - not even any software! - that I hope will help someone in the future not have to design their own if they need it. Building these this way let me put together 10 breakouts for about $50 - saving me more than half the cost of buying April boards and getting me a preferable USB connector and mounting holes, at the cost of a couple hours of work.
Since I was also watching TV while I was doing that work, I’m happy with that tradeoff.