
Pinbox: Open Hardware Advent Calendar Day 16
This one’s another project in progress - a controller for playing PC-based pinball.
Overview
Recently, we started playing Pinball Arcade - a really nice pinball simulator. As some of the people behind DIYPinball, naturally we find virtual pinball games to be lacking, but you can’t always take a pinball machine with you.
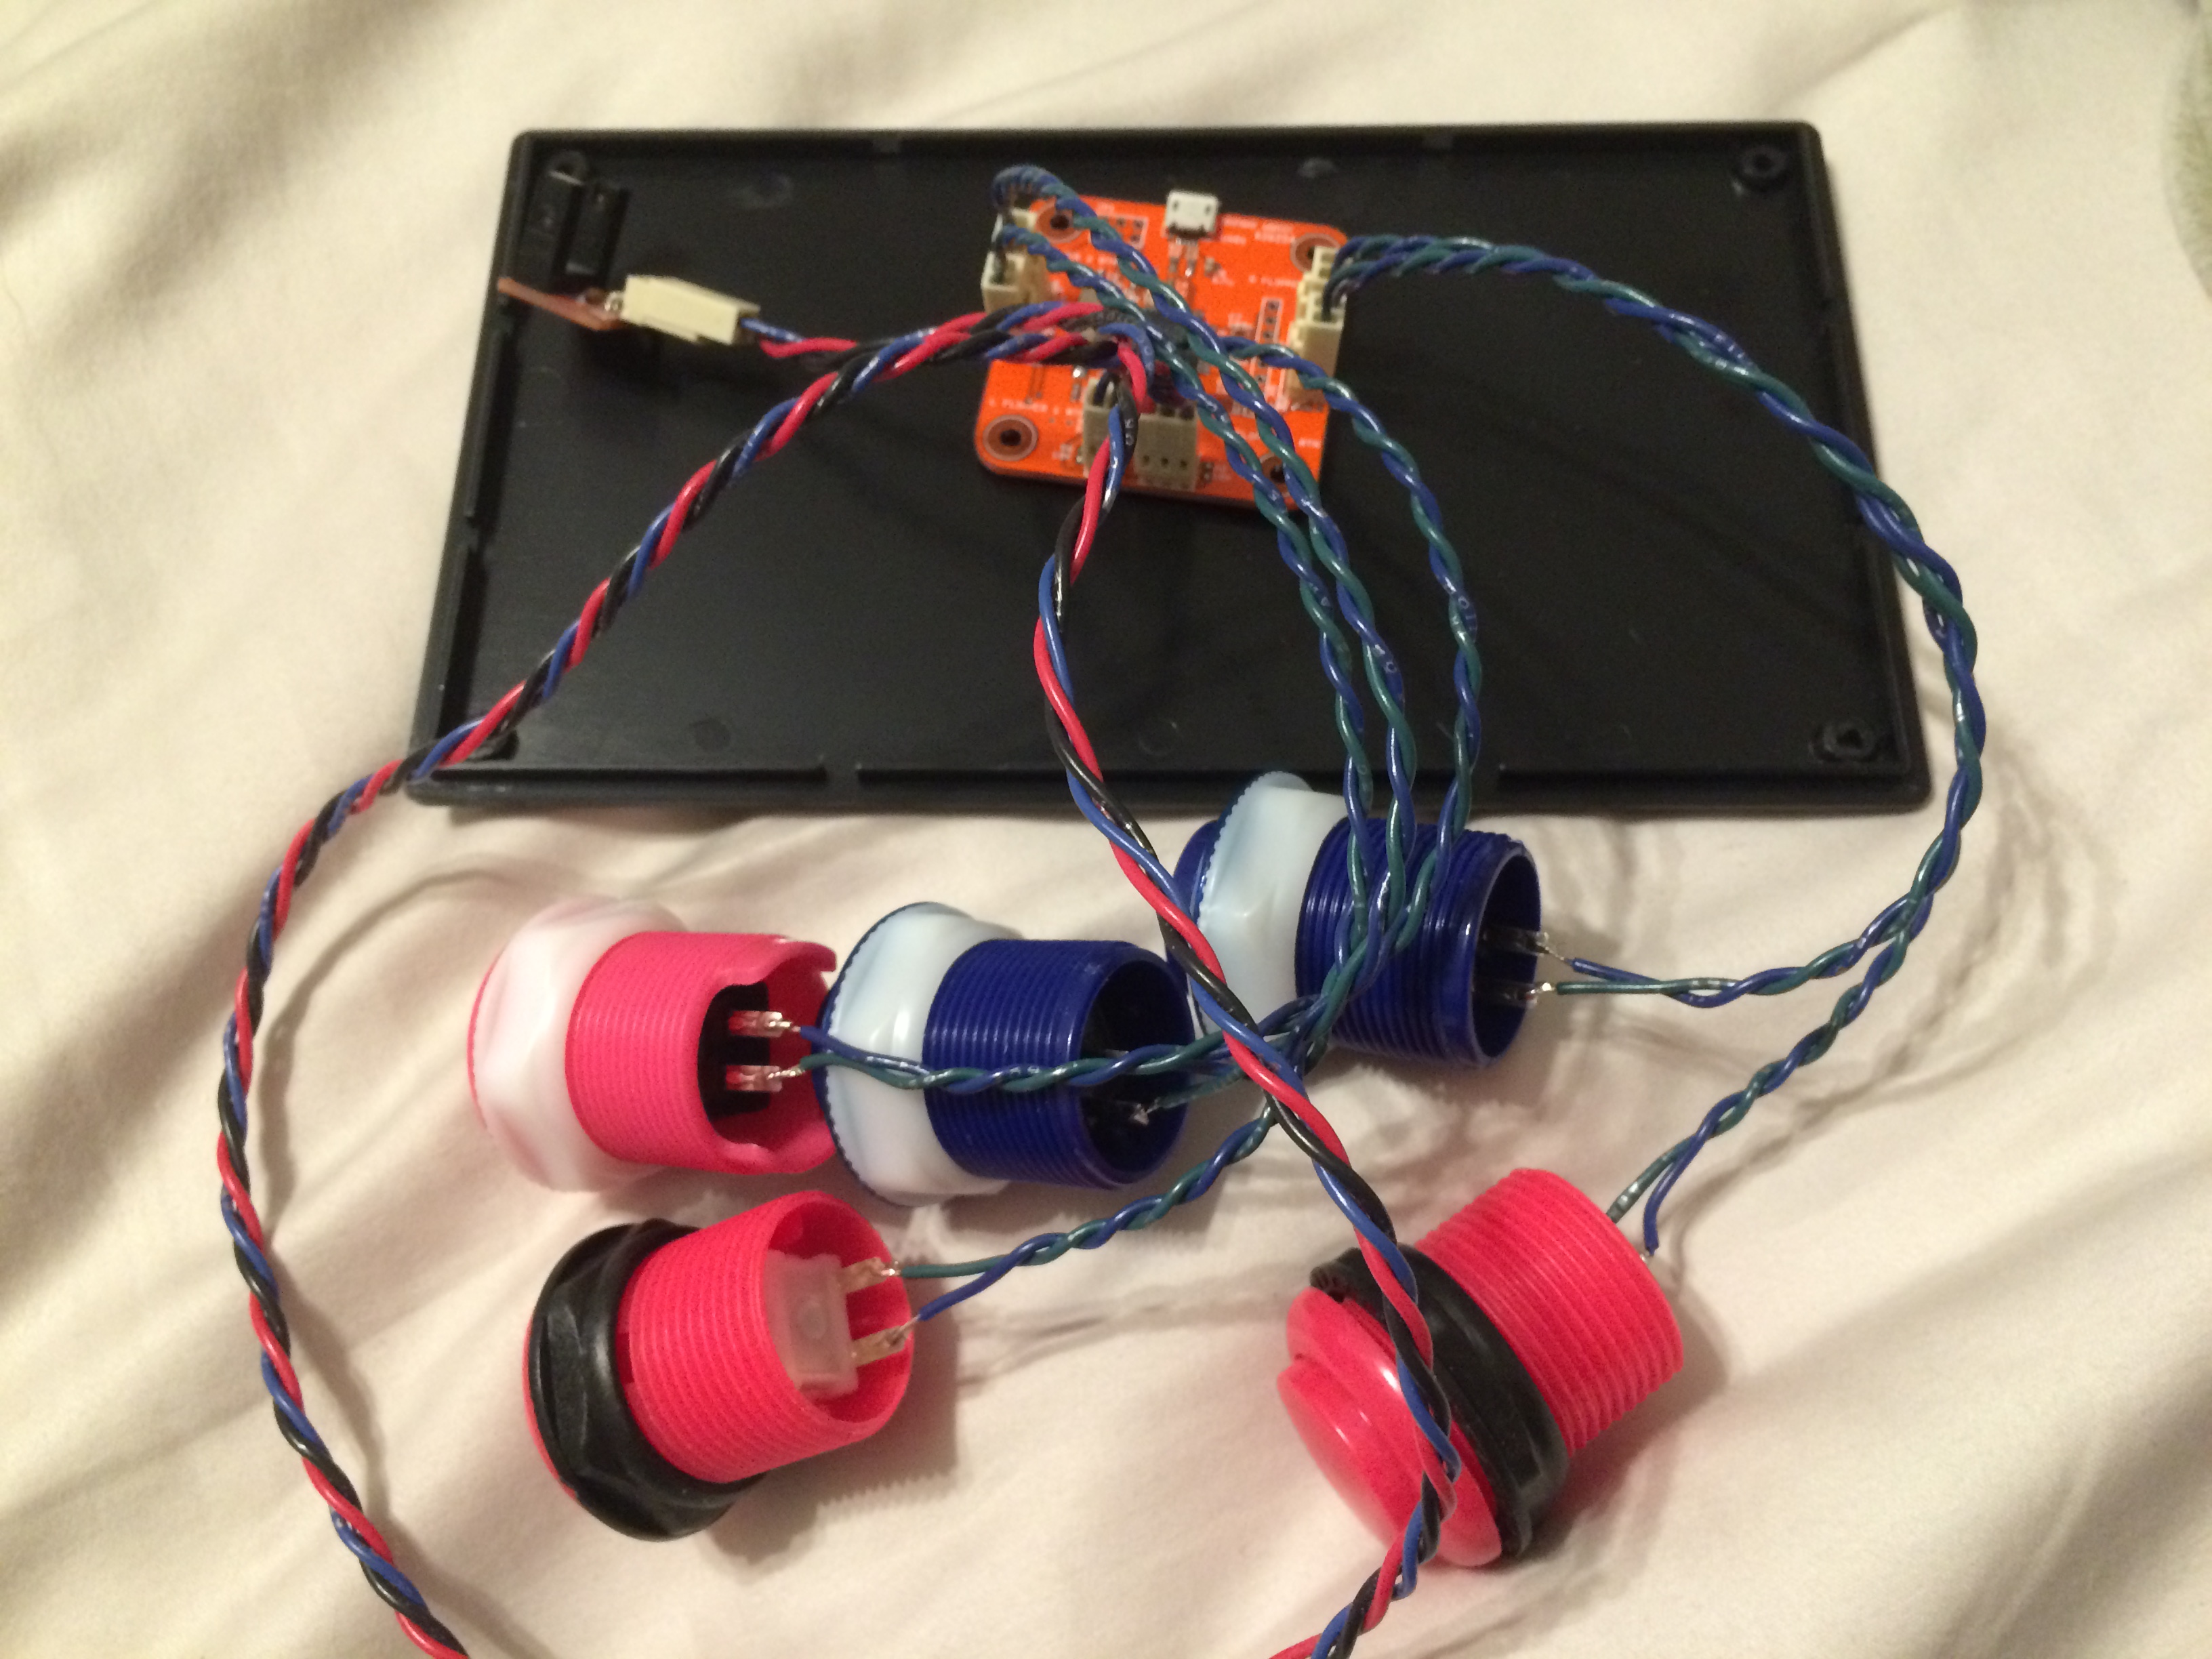
Enter the Pinbox: a custom controller for playing pinball on a computer. Rather than using your shift keys and spacebar, you get actual arcade buttons on the sides of a box, and a plunger. Or at least you will when we finish it.
Hardware
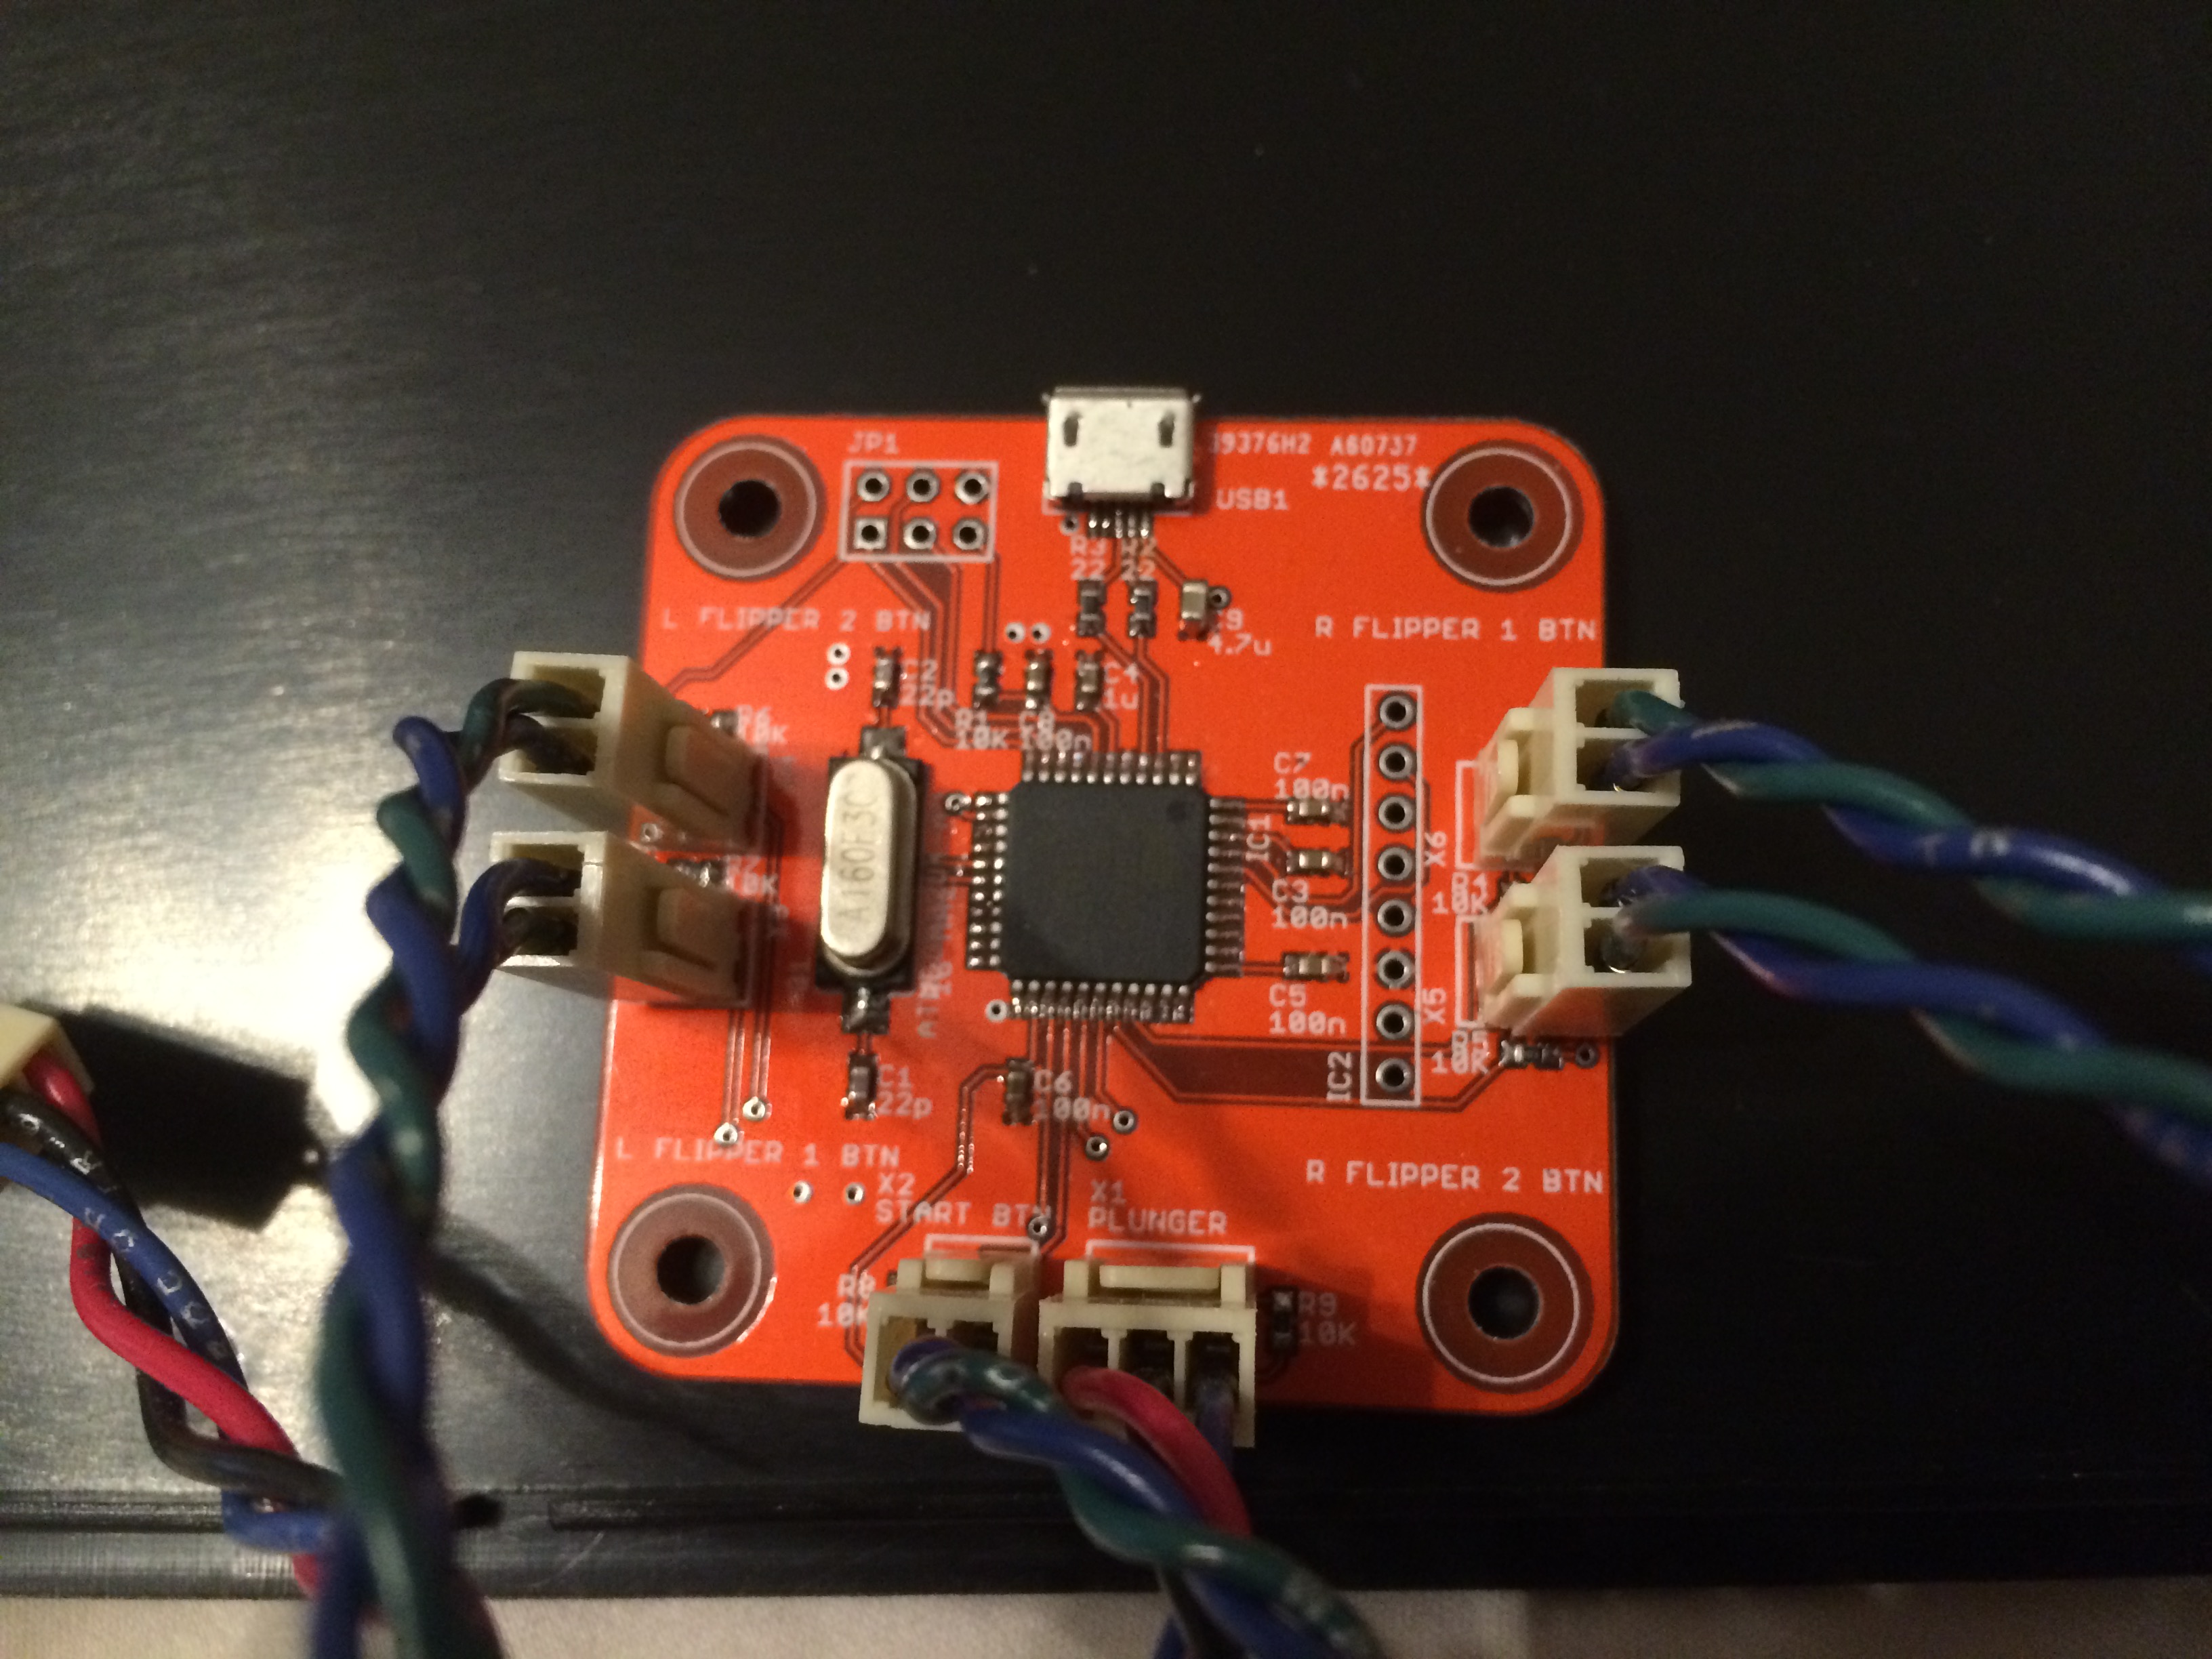
The circuit is basically an Arduino Leonardo on a 5cm x 5cm circuit board. An ATMega32U4 is the brain, and it has five inputs for buttons - two flippers both left and right, and a start button - and an input for a SparkFun photointerrupter board. It also has a header for installing an eventual accelerometer module for tilt detection.
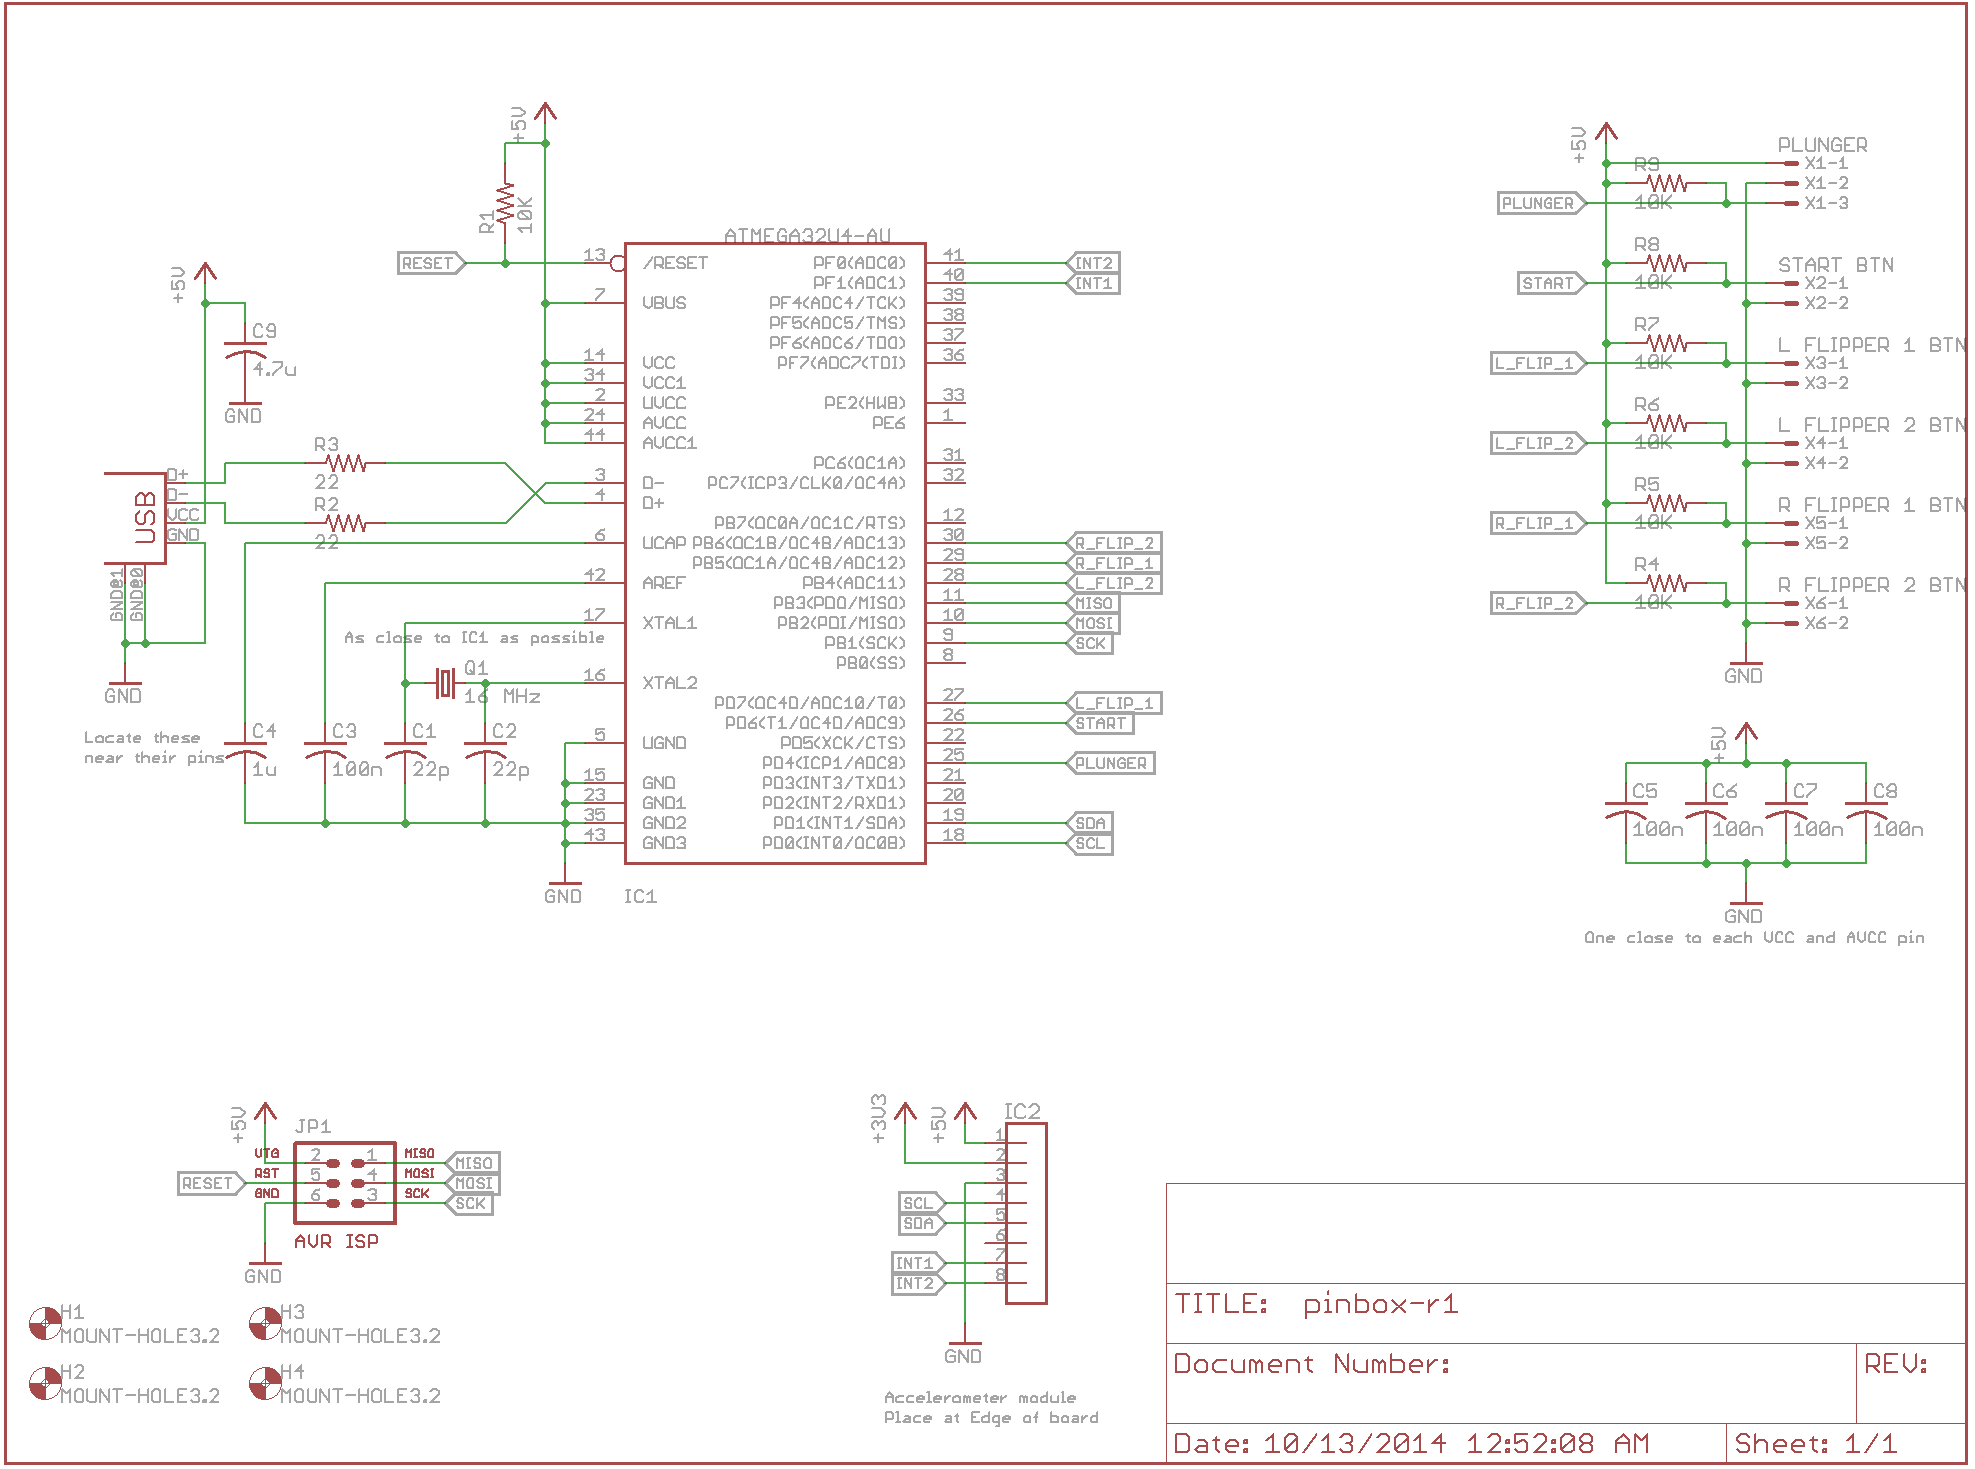
Schematic and PCB files can be downloaded from our GitHub.
Software
The software is still in progress. The basic function is to act as a USB keyboard, activating the shift keys for the flipper buttons, the Return key for the start button, and the spacebar for the plunger. It uses some debouncing using the Bounce library to take care of the button inputs. Eventually the software will be expanded to interface with the accelerometer to allow you to bump and tilt the table. We use the Leonardo’s built-in Keyboard library to handle sending keypresses to the computer.
Before loading the code, the AVR on the Pinbox board needs to be loaded with the Caterina bootloader. This is done by connecting an AVR programmer to JP1 - I use a USBTinyISP - and using Tools -> Burn Bootloader. From then on, the board can be programmed over USB, just like an Arduino Leonardo.
Source code can be downloaded from our GitHub.
Future plans
This one’s still a work in progress. We still need to figure out the plunger mechanism, using the optical sensor and a knob of some sort. After that, we need to mount it in a box - and then, we need to hook up the accelerometer. So there’s plenty to do, but a clear path to the finish.