Introducing the 2013 Christmas PCBs
Two years ago, I made a snowman circuit board. It was a fairly simple board - white with black silkscreen artwork, and a bunch of LEDs for the scarf and buttons on the snowman. A small PIC microcontroller handled blinking the LEDs in various patterns, and a button allowed the user to switch between patterns, as well as turn the unit off. Power came from a small watch battery. I made 100 of them, and they were a huge hit.
I’ve shown these at various Maker Faires over the two years since, and one question always came up: “Are you selling these?” Two years later, I’ve finally gotten the message, and came up with a new design. While the original was an all-Surface Mount affair (since I was the one building all of them), this new design is a through hole design, intended to be distributed as a soldering kit. There are four different designs, as well: a snowman, a snowflake, a candy cane, and a christmas tree. It’s also designed around an AVR microcontroller so that an open source toolchain can be used.
In this post, I’ll go over each of the boards quickly. Future posts will cover how the hardware and firmware works, how to assemble them, and how to modify the firmware to change the blinking patterns.
Candy cane board
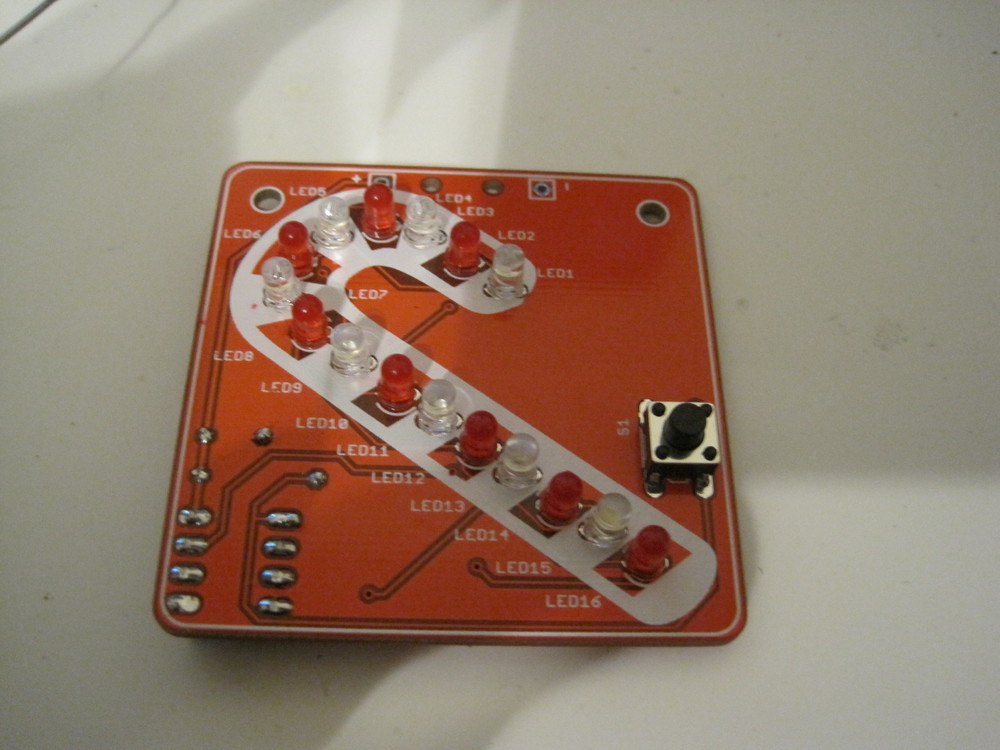
The candycane board has 16 LEDs, alternating 8 red and 8 white in my construction. This can be changed when the user builds it on their own, of course. The board is made with a red solder mask and white silkscreen. It has seven patterns and an off state, which you can rotate through using the button on the right-hand side of the board. The patterns are:
- Off
- All lights on
- All lights blinking
- Alternating red and white
- Fill in from the short end of the candy cane
- Marquee
- Twinkling
- Fill in from the long end of the candy cane
Here’s a video showing all of the patterns, in order:
Christmas tree board
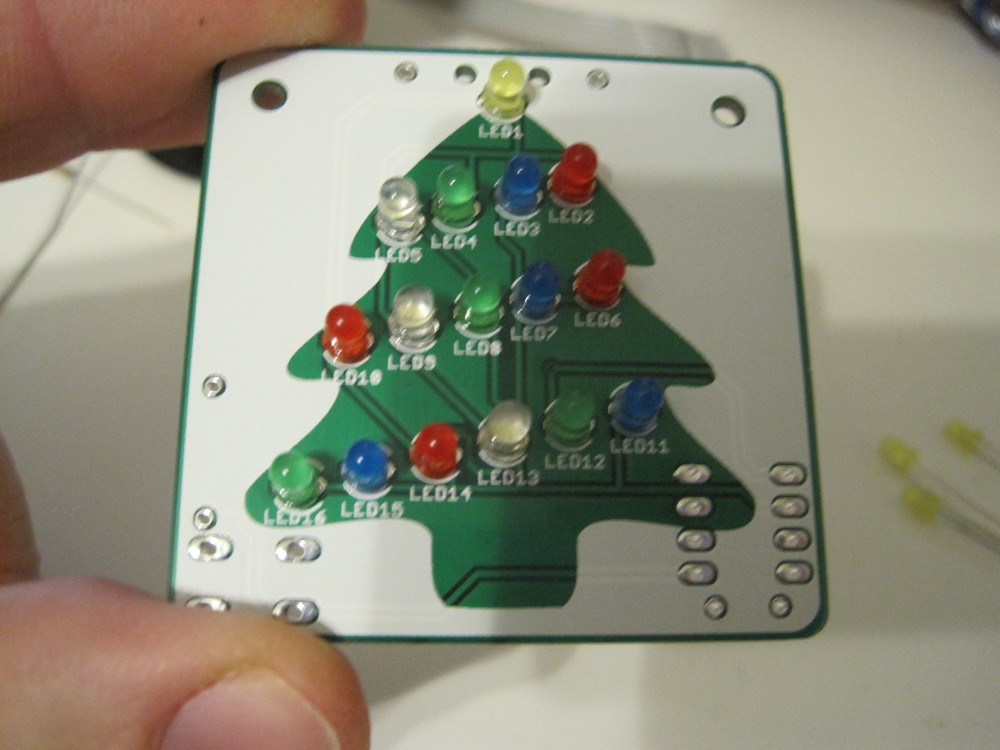
The Christmas Tree board has 17 LEDs, with a yellow star at the top and whatever arrangement the user wants for the lights in the tree. The board has standard green solder mask and white silkscreen. The patterns are:
- Off
- All lights on
- All lights blinking
- Marquee
- Fill in from the right
- Fill in from the bottom
- Twinkle all lights
- Twinkle all lights, except the star, which is always on
All of these are shown in the following video:
Snowman board

The snowman consists of 10 LEDs: one red nose, three white buttons, and six LEDs along the scarf. The board has a white solder mask and black silkscreen. The patterns are:
- Off
- All lights on
- All lights blinking
- Nose on, all others marquee
- Nose and buttons on, scarf marquee
- Twinkle all lights
- Nose and buttons on, scarf twinkling
- Nose and buttons on, scarf fills in from the right
All of the patterns are shown in this video:
Snowflake board
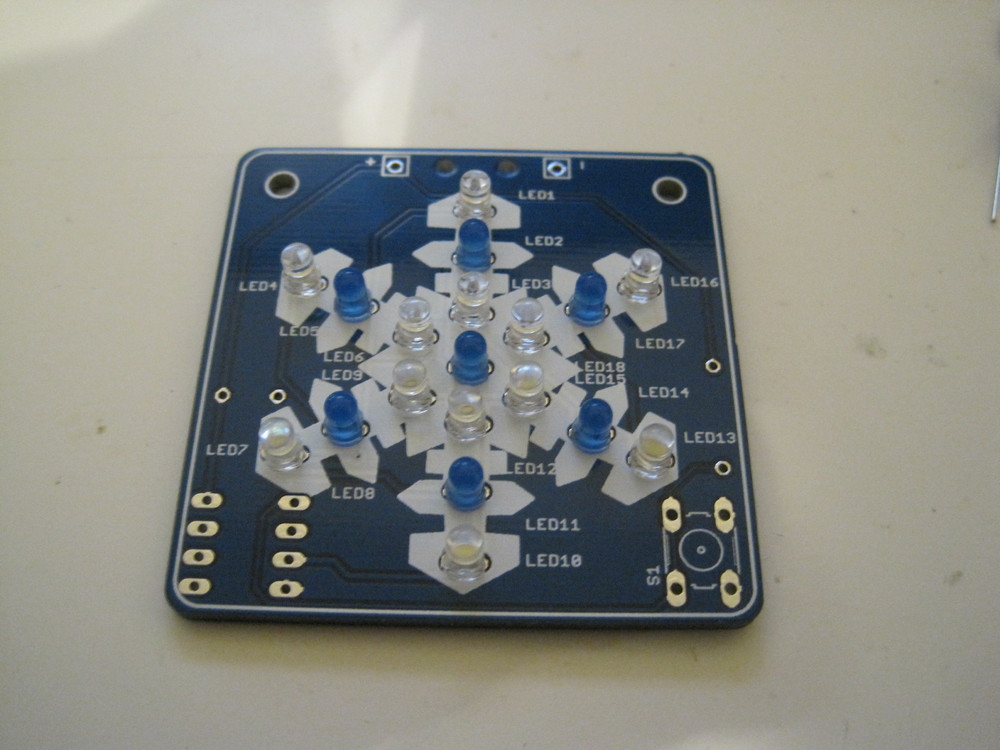
The snowflake is my favourite. It has 19 LEDs total, blue and white alternating along six spokes of a snowflake. It’s on a board with blue solder mask and white silkscreen. It has the following patterns:
- Off
- All lights on
- All lights blinking
- Alternating blink
- Starburst (fill in from centre)
- Spiral fill
- Pinwheel (basically a rotating line)
- Twinkle
All of these are shown in this video:
What's next
The boards have turned out very well. I’m still waiting on a few parts to arrive, so unfortunately I’m not going to be selling many this year. However, with a few tweaks I should have them ready well before Christmas next year.
The next few posts will go over the design and build instructions, as well as some lessons learned in the process. These boards are being released as open source, so you’ll be able to make your own if you like and modify as you see fit.